In this tutorial we will learn how to use React Native Paper Library In the React Native Projects. We will learn with examples for both Android and IOS applications.

What Is React Native Paper?
React Native Paper is a UI component Material Design library that allows us to create beautiful designs with high quality cross-platform components. Paper is a collection of customizable and production-ready components for React Native.
Or we can say that React Native Paper is high-quality, standard-compliant Material Design library that has you covered in all major use-cases.
Simply you can use the Google Material Design Library’s Components like TextInput, Icons, ButtonIcons, Card, Button and much more from here.
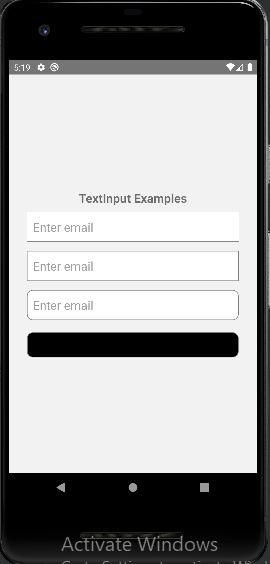
For example we created some component that you can understand in easy way. You can try all from the above link. We have created a TextInput, IconButton and a Button in the below code. You can create many more components from material design.
Examples of Button, Icons and TextInput Using RN Paper
import * as React from 'react';
import { TextInput, Button, IconButton } from 'react-native-paper';
import { View, Text } from 'react-native';

const Test = () => {
  const [text, setText] = React.useState('');

  return (
    <View style={{ margin: 20 }}>
      <TextInput
        theme={{ colors: { primary: 'green', underlineColor: 'transparent' } }}
        selectionColor="red"
        mode="outlined"
        label="Email"
        value={text}
        onChangeText={(text) => setText(text)}
      />
      <Button
        style={{ backgroundColor: 'pink', margin: 10 }}
        icon="access-point">
        Press me
      </Button>
      <Button icon="account-arrow-right-outline"></Button>
      <IconButton icon="check" size={28} color="#8CAD81" activeOpacity={0.5} />
    </View>
  );
};

export default Test;
Result
The below screenshot shows the result of above code.

RN Paper Card Example
The below example demonstrate the example for using RN Paper Card. Card mainly used to show the data on screen in a rounded corners with rectangle shape. The card appears like it is on the screen. It provide the beautiful look in the apps.
import * as React from 'react';
import { Avatar, Button, Card, Title, Paragraph } from 'react-native-paper';
import { View, Text } from 'react-native';

const LeftContent = (props) => <Avatar.Icon {...props} icon="message-plus" />;

const Test = () => {
  const [text, setText] = React.useState('');

  return (
    <View style={{ margin: 40 }}>
      <Card>
        <Card.Title
          title="Card Title"
          subtitle="Card Subtitle"
          left={LeftContent}
        />
        <Card.Content>
          <Title>Card Title</Title>
          <Paragraph>Card Description Here</Paragraph>
        </Card.Content>
        <Card.Cover source={{ uri: 'https://picsum.photos/700' }} />
        <Card.Actions>
          <Button>Cancel</Button>
          <Button>Ok</Button>
        </Card.Actions>
      </Card>
    </View>
  );
};

export default Test;
Result

More React Native Paper Components:
There are much more component that can be use from the Material Design Library of Google from here. Below is the list of some of the important Components:
- ActivityIndicator
- AppBar
- Avtar
- BottomNavigation
- Button
- Card
- More…
You can use these Material designs components to create your React Native app more beautiful. Some of the default components don’t give much clarity and look like for IOS applications. You can achieve that look using the Material Design Library.
Thank you for visiting the tutorial on FlutterTpoint. Hope you got the Paper in RN. Please visit more useful tutorials for React Native which will improve your development skills.