In this example we will learn how to create a navigation drawer in android studio. Mainly it opens from the left or right side when we slide our finger in android mobiles . It is also called sidebar in android studio. This is also called android drawerlayout.
What is navigation drawer in android studio?
Navigation Drawer is part of the screen that contains some data like header and menu items in android. It opens when we click on the toggle button. Usually the toggle button is placed on the toolbar. This also opens when we slide the android device screen from the sidebar as made from left or right.

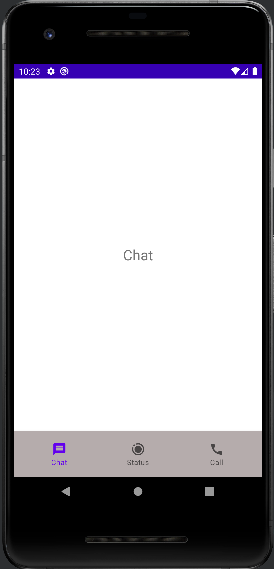
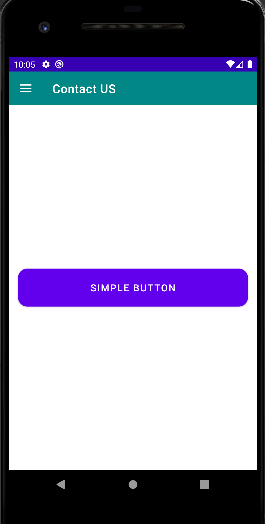
See the above image, this is an example of a navigation drawer. As i told you it contains some data like header layout and menu items. When we click on any item it will load or redirect to another screen. We can also move to another android screen by clicking on its header layout.
Why do we use the navigation drawer in android?
When we want to load multiple screens at one place and can go to any screen from one place. Then we use navigation drawer in android. The drawer and its items remain the same when we click on its navigation menu items. The desired screen is loaded only and it replaces the previous screen.
How to create a navigation drawer in android studio?
To create a drawerlayout in android, you have to create the following screens and classes. We needed following components :-
- DrawerLayout
- Toolbar
- FrameLayout
- Header Layout
- Navigation Items
- NavigationView
Now we will discuss one by one in brief.
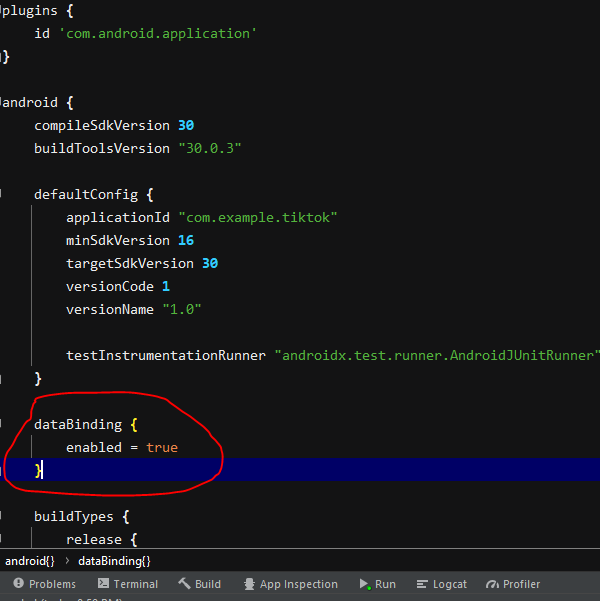
Enable DataBinding in android studio
Please note that I used DataBinding in this project to fetch ids. So first please enable dataBinding. Click here to enable dataBinding in android studio.
1 DrawerLayout
It is the parent widget of the screen in which we want to add the drawer. It contains Toolbar, FrameLayout and NavigationView. We have to create all these three item inside the drawerlayout.
To create navigation drawer in android, we are using androidx library. Material design also provides drawerlayout. There is no big difference between these two. Use following component to create drawerLayout-
    <androidx.drawerlayout.widget.DrawerLayout
        android:id="@+id/drawer"
        android:layout_width="match_parent"
        android:layout_height="match_parent"
        tools:context=".MainActivity"
        tools:openDrawer="start">
    </androidx.drawerlayout.widget.DrawerLayout>
Don’t forget to add the following line in this drawerLayout.
tools:openDrawer=”start”
2. Toolbar
Toolbar is fixed at the top of the screen. Navigation drawer toggle in android takes place on it. It can be left side or right side according to us, we are creating it from the left side. By clicking on the toggle icon, the drawer will open from the left side.
<androidx.appcompat.widget.Toolbar
    android:id="@+id/toolbar"
    android:layout_width="match_parent"
    android:layout_height="wrap_content"
    android:minHeight="?attr/actionBarSize"
    android:background="@color/design_default_color_secondary"/>
To use the toolbar height use the following component in the toolbar.
android:minHeight=”?attr/actionBarSize”
3. FrameLayout
FrameLayout in android is used to load multiple screens in a single place. Generally it loads fragments instead of activity. So we have to create the screen of the fragment type, which we want to load in this layout by clicking on navigation drawer items.
To create FrameLayout use the following code in your project.
<FrameLayout
    android:id="@+id/frameLayout"
    android:layout_width="match_parent"
    android:layout_height="match_parent" />
4. Header Layout
Header layout is not any specific layout, this is just a simple layout which is shown in above image. Generally it contains a circular image, name and email id. So this is custom you can create it according to you and set the data.
You can create it in app – > res -> layout. And mouse right click – > new -> Layout Resource File and give a name as you want. After creating this layout copy and paste the following code-
<?xml version="1.0" encoding="utf-8"?>
<layout
    xmlns:android="http://schemas.android.com/apk/res/android">

<androidx.appcompat.widget.LinearLayoutCompat
    android:layout_width="match_parent"
    android:layout_height="wrap_content"
    android:orientation="vertical">

    <androidx.appcompat.widget.LinearLayoutCompat
        android:layout_width="match_parent"
        android:layout_height="wrap_content"
        android:layout_margin="15dp"
        android:padding="10dp"
        android:orientation="horizontal">

        <de.hdodenhof.circleimageview.CircleImageView
            android:layout_width="60dp"
            android:layout_height="60dp"
            android:layout_weight="1"
            android:src="@drawable/ic_emoji"/>

        <androidx.appcompat.widget.LinearLayoutCompat
            android:layout_width="wrap_content"
            android:layout_height="wrap_content"
            android:layout_weight="3"
            android:paddingLeft="10dp"
            android:orientation="vertical">

            <TextView
                android:layout_width="wrap_content"
                android:layout_height="wrap_content"
                android:text="Rakesh saini"
                android:textSize="16dp"
                android:textColor="@color/black"/>

            <TextView
                android:layout_width="wrap_content"
                android:layout_height="wrap_content"
                android:text="[email protected]"
                android:textSize="16dp"
                android:textColor="@color/black"/>

        </androidx.appcompat.widget.LinearLayoutCompat>

    </androidx.appcompat.widget.LinearLayoutCompat>

    <View
        android:layout_width="match_parent"
        android:layout_height="0.1dp"
        android:background="@color/black"/>

</androidx.appcompat.widget.LinearLayoutCompat>
</layout>
5. Navigation Items
To show the items in the navigation drawer we have to create a list of items. With icons and text. These items will be listed below the header layout in drawerLayout in android.
First of all create the menu directory in res using the way – res -> right click -> new – > Android Resource Directory and name it menu.
After that right click on menu directory – > new -> Menu Resource File -> give a name -> Choose menu as Directory name from dropdown. And paste the following code.
<?xml version="1.0" encoding="utf-8"?>
<menu xmlns:android="http://schemas.android.com/apk/res/android">

    <group android:id="@+id/group"
        android:checkableBehavior="single">

    <item
        android:id="@+id/nav_home"
        android:icon="@drawable/ic_home"
        android:title="Home" />

    <item
        android:id="@+id/nav_contactUs"
        android:icon="@drawable/ic_book"
        android:title="Contact Us" />

    <item
        android:id="@+id/nav_aboutUs"
        android:icon="@drawable/ic_about"
        android:title="About Us" />

    </group>
</menu>
I created only three items you can create here as much as you want. And add the icon from the drawable folder.
6. NavigationView
NavigationView holds the navigation drawer elements like headerLayout and navigation items. We can manage it according to us by giving the padding, margin and other styles. Use the following code for NavigationView –
<com.google.android.material.navigation.NavigationView
    android:id="@+id/navView"
    android:layout_width="match_parent"
    android:layout_height="match_parent"
    android:layout_gravity="start"
    android:paddingVertical="20dp"
    app:headerLayout="@layout/nav_header_layout"
    app:menu="@menu/navigation_item"
    app:itemHorizontalPadding="40dp"
    app:itemIconPadding="30dp"
    app:itemIconSize="20dp"
    android:fitsSystemWindows="true"
    android:background="@color/white"
    android:theme="@style/AppTheme"
    app:itemBackground="@drawable/item_background_nav_checked"
    app:itemTextAppearance="?android:attr/textAppearanceSmallInverse"/>
Complete Example of Navigation Drawer in android
I combined the above whole code and created an example. You can directly use following code in your project –
activity_main.xml
This is the main layout xml file which contains DrawerLayout, Toolbar, FrameLayout and NavigationView. Cope and paste it to use.
<?xml version="1.0" encoding="utf-8"?>
<layout xmlns:android="http://schemas.android.com/apk/res/android"
    xmlns:app="http://schemas.android.com/apk/res-auto"
    xmlns:tools="http://schemas.android.com/tools">

    <androidx.drawerlayout.widget.DrawerLayout
        android:id="@+id/drawer"
        android:layout_width="match_parent"
        android:layout_height="match_parent"
        tools:context=".MainActivity"
        tools:openDrawer="start">

        <androidx.appcompat.widget.LinearLayoutCompat
            android:layout_width="match_parent"
            android:layout_height="match_parent"
            android:orientation="vertical">

            <androidx.appcompat.widget.Toolbar
                android:id="@+id/toolbar"
                android:layout_width="match_parent"
                android:layout_height="wrap_content"
                android:minHeight="?attr/actionBarSize"
                android:background="@color/design_default_color_secondary"/>

            <FrameLayout
                android:id="@+id/frameLayout"
                android:layout_width="match_parent"
                android:layout_height="match_parent" />

        </androidx.appcompat.widget.LinearLayoutCompat>

        <com.google.android.material.navigation.NavigationView
            android:id="@+id/navView"
            android:layout_width="match_parent"
            android:layout_height="match_parent"
            android:layout_gravity="start"
            android:paddingVertical="20dp"
            app:headerLayout="@layout/nav_header_layout"
            app:menu="@menu/navigation_item"
            app:itemHorizontalPadding="40dp"
            app:itemIconPadding="30dp"
            app:itemIconSize="20dp"
            android:fitsSystemWindows="true"
            android:background="@color/white"
            android:theme="@style/AppTheme"
            app:itemBackground="@drawable/item_background_nav_checked"
            app:itemTextAppearance="?android:attr/textAppearanceSmallInverse"/>

    </androidx.drawerlayout.widget.DrawerLayout>
</layout>
MainActivity.java
For back pressed i created the OnBackPressed interface in MainActivity. When we are in the last Fragment like in About Us Fragment. If we press back button then we will redirect to the home Fragment like in HomeFragment().
I also changed the color of the selected item in the navigation drawer of android. Like if i press on Contact Us item then its background color will be changed. So this feature is already implemented in this.
To load the fragment in frameLayout in navigation drawer in android, FragmentManager and FragmentTransaction are used to call the next drawer item. So I created all these functions inside a CallFragment() and passed the fragment inside it. And this method is calling from onNavigationItemSelectedListener. I used switch() to call different fragments by using id from the menu item.
package com.example.androidtestingproject;

import androidx.appcompat.app.ActionBarDrawerToggle;
import androidx.appcompat.app.AppCompatActivity;
import androidx.core.view.GravityCompat;
import androidx.databinding.DataBindingUtil;
import androidx.fragment.app.Fragment;
import androidx.fragment.app.FragmentManager;
import androidx.fragment.app.FragmentTransaction;

import android.graphics.Color;
import android.os.Bundle;
import android.view.MenuItem;

import com.example.androidtestingproject.Fragment.AboutUsFragment;
import com.example.androidtestingproject.Fragment.ContactUsFragment;
import com.example.androidtestingproject.Fragment.HomeFragment;
import com.example.androidtestingproject.databinding.ActivityMainBinding;
import com.google.android.material.navigation.NavigationView;

public class MainActivity extends AppCompatActivity {
    private ActivityMainBinding binding;
    private ActionBarDrawerToggle toggle;
    private OnBackPressedListener onBackpressedListener;


    @Override
    protected void onCreate(Bundle savedInstanceState) {
        super.onCreate(savedInstanceState);
        binding = DataBindingUtil.setContentView(this, R.layout.activity_main);

        initView();
    }

    private void initView() {

        setSupportActionBar(binding.toolbar);
        binding.toolbar.setTitleTextColor(Color.WHITE);

        //set default home fragment and its title
        getSupportActionBar().setTitle("Home");
        getSupportFragmentManager().beginTransaction().replace(R.id.frameLayout, new HomeFragment()).commit();
        binding.navView.setCheckedItem(R.id.nav_home);

        toggle = new ActionBarDrawerToggle(this, binding.drawer, binding.toolbar, R.string.open, R.string.close);
        binding.drawer.addDrawerListener(toggle);
        toggle.getDrawerArrowDrawable().setColor(getResources().getColor(R.color.white));
        toggle.syncState();

        //navigation item click
        binding.navView.setNavigationItemSelectedListener(new NavigationView.OnNavigationItemSelectedListener() {
            Fragment fragment = null;
            @Override
            public boolean onNavigationItemSelected( MenuItem item) {
                switch (item.getItemId()){
                    case R.id.nav_home:
                        fragment = new HomeFragment();
                        binding.drawer.closeDrawer(GravityCompat.START);
                        getSupportActionBar().setTitle("Home");
                        callFragment(fragment);
                        break;

                    case R.id.nav_contactUs:
                        fragment = new ContactUsFragment();
                        binding.drawer.closeDrawer(GravityCompat.START);
                        getSupportActionBar().setTitle("Contact US");
                        callFragment(fragment);
                        break;

                    case R.id.nav_aboutUs:
                        fragment = new AboutUsFragment();
                        binding.drawer.closeDrawer(GravityCompat.START);
                        getSupportActionBar().setTitle("About US");
                        callFragment(fragment);
                        break;

                }
                return true;
            }
        });

    }

    //loading the another fragment in viewPager
    private void callFragment(Fragment fragment){
        FragmentManager manager = getSupportFragmentManager();
        FragmentTransaction transaction = manager.beginTransaction();
        transaction.setCustomAnimations(android.R.anim.slide_in_left, android.R.anim.slide_out_right);
        transaction.replace(R.id.frameLayout, fragment);
        transaction.addToBackStack(null);
        transaction.commit();
    }

    //on backpress
    @Override
    public void onBackPressed() {
        if (onBackpressedListener !=null){
            getSupportActionBar().setTitle("Home");
            binding.navView.setCheckedItem(R.id.nav_home);
            onBackpressedListener.doBack();
            binding.drawer.closeDrawer(GravityCompat.START);
        }else if(onBackpressedListener == null){
            finish();
            super.onBackPressed();
        }
    }

    public interface OnBackPressedListener {
        void doBack();
    }
    public void setOnBackPressedListener(OnBackPressedListener onBackPressedListener){
        this.onBackpressedListener = onBackPressedListener;
    }

    @Override
    protected void onDestroy() {
        onBackpressedListener = null;
        super.onDestroy();
    }
}
nav_header_layout.xml
Add the following dependency for CircleImageView.
//circular image
implementation 'de.hdodenhof:circleimageview:3.1.0'
This layout file contains the headerLayout data. Use your icons or photos from the drawable folder in CircleImageView as src.
<?xml version="1.0" encoding="utf-8"?>
<layout
    xmlns:android="http://schemas.android.com/apk/res/android">

<androidx.appcompat.widget.LinearLayoutCompat
    android:layout_width="match_parent"
    android:layout_height="wrap_content"
    android:orientation="vertical">

    <androidx.appcompat.widget.LinearLayoutCompat
        android:layout_width="match_parent"
        android:layout_height="wrap_content"
        android:layout_margin="15dp"
        android:padding="10dp"
        android:orientation="horizontal">

        <de.hdodenhof.circleimageview.CircleImageView
            android:layout_width="60dp"
            android:layout_height="60dp"
            android:layout_weight="1"
            android:src="@drawable/ic_emoji"/>

        <androidx.appcompat.widget.LinearLayoutCompat
            android:layout_width="wrap_content"
            android:layout_height="wrap_content"
            android:layout_weight="3"
            android:paddingLeft="10dp"
            android:orientation="vertical">

            <TextView
                android:layout_width="wrap_content"
                android:layout_height="wrap_content"
                android:text="Rakesh saini"
                android:textSize="16dp"
                android:textColor="@color/black"/>

            <TextView
                android:layout_width="wrap_content"
                android:layout_height="wrap_content"
                android:text="[email protected]"
                android:textSize="16dp"
                android:textColor="@color/black"/>

        </androidx.appcompat.widget.LinearLayoutCompat>

    </androidx.appcompat.widget.LinearLayoutCompat>

    <View
        android:layout_width="match_parent"
        android:layout_height="0.1dp"
        android:background="@color/black"/>

</androidx.appcompat.widget.LinearLayoutCompat>
</layout>
navigation_item.xml for navigation drawer
These are navigation items which will be listed below the header in the navigation drawer. Change the icons from your icon from the drawable folder. You can expand this list as you need.
<?xml version="1.0" encoding="utf-8"?>
<menu xmlns:android="http://schemas.android.com/apk/res/android">

    <group android:id="@+id/group"
        android:checkableBehavior="single">

    <item
        android:id="@+id/nav_home"
        android:icon="@drawable/ic_home"
        android:title="Home" />

    <item
        android:id="@+id/nav_contactUs"
        android:icon="@drawable/ic_book"
        android:title="Contact Us" />

    <item
        android:id="@+id/nav_aboutUs"
        android:icon="@drawable/ic_about"
        android:title="About Us" />

    </group>
</menu>
item_background_nav_checked
Create a Drawable Resource file in drawable folder and give the name – > item_background_nav_checked
This file is used to change the color of selected navigation drawer items. When we click on any item it will show as selected and its background color will be changed, so we understand that this item is selected.
<?xml version="1.0" encoding="utf-8"?>
<selector xmlns:android="http://schemas.android.com/apk/res/android">
    <item android:drawable="@color/purple_500"
        android:state_checked="true"/>
</selector>
Fragments For Navigation Drawer in Android
Here we created three navigation items, So we needed to create three fragments to show the data. These are different from activities. I created three fragments. You can create these as follows –
Java -> first package – > Right click -> New – > Fragment – > Fragment ( Blank )
And copy paste the following code for all these three fragments. After Copy and paste you can manage the layout as you need.
HomeFragment.java
All these three fragments contain TextView only.
package com.example.androidtestingproject.Fragment;

import android.app.AlertDialog;
import android.content.DialogInterface;
import android.content.Intent;
import android.os.Bundle;

import androidx.databinding.DataBindingUtil;
import androidx.fragment.app.Fragment;

import android.view.LayoutInflater;
import android.view.View;
import android.view.ViewGroup;

import com.example.androidtestingproject.BottomNavigationActivity;
import com.example.androidtestingproject.MainActivity;
import com.example.androidtestingproject.R;
import com.example.androidtestingproject.databinding.FragmentHomeBinding;

public class HomeFragment extends Fragment implements MainActivity.OnBackPressedListener {
    private FragmentHomeBinding binding;
    private View view;

    @Override
    public View onCreateView(LayoutInflater inflater, ViewGroup container,
                             Bundle savedInstanceState) {
        // Inflate the layout for this fragment
        binding = DataBindingUtil.inflate(inflater, R.layout.fragment_home, container, false);
        ((MainActivity) getActivity()).setOnBackPressedListener(this);
        view = binding.getRoot();
        initView();
        return view;
    }

    private void initView() {
      //code here
    }

    //exit on backpressed
    @Override
    public void doBack() {
        new AlertDialog.Builder(getActivity())
                .setTitle("Do you want to exit?")
                .setMessage("Really want to exit?")
                .setNegativeButton("No", null)
                .setPositiveButton("Yes", new DialogInterface.OnClickListener() {
                    @Override
                    public void onClick(DialogInterface dialog, int which) {
                        getActivity().finishAffinity();
                        getActivity().finish();
                    }
                }).create().show();
    }
}
fragment_home.xml
<?xml version="1.0" encoding="utf-8"?>
<layout
    xmlns:android="http://schemas.android.com/apk/res/android"
    xmlns:tools="http://schemas.android.com/tools">

<RelativeLayout
    android:layout_width="match_parent"
    android:layout_height="match_parent"
    tools:context=".Fragment.HomeFragment"
    android:background="@color/white">

    <TextView
        android:id="@+id/textHome"
        android:layout_width="wrap_content"
        android:layout_height="wrap_content"
        android:layout_centerInParent="true"
        android:layout_gravity="center"
        android:text="Home Fragment"
        android:textColor="@color/teal_700"
        android:textSize="24dp" />

</RelativeLayout>
</layout>
ContactUsFragment.java
package com.example.androidtestingproject.Fragment;

import android.os.Bundle;

import androidx.databinding.DataBindingUtil;
import androidx.fragment.app.Fragment;
import androidx.fragment.app.FragmentManager;
import androidx.fragment.app.FragmentTransaction;

import android.view.LayoutInflater;
import android.view.View;
import android.view.ViewGroup;

import com.example.androidtestingproject.MainActivity;
import com.example.androidtestingproject.R;
import com.example.androidtestingproject.databinding.FragmentContactUsBinding;

public class ContactUsFragment extends Fragment implements MainActivity.OnBackPressedListener {
    private FragmentContactUsBinding binding;
    private View view;
    @Override
    public View onCreateView(LayoutInflater inflater, ViewGroup container,
                             Bundle savedInstanceState) {
        // Inflate the layout for this fragment
        binding = DataBindingUtil.inflate(inflater, R.layout.fragment_contact_us, container, false);
        ((MainActivity) getActivity()).setOnBackPressedListener(this);
        view = binding.getRoot();
        initView();
        return view;
    }

    private void initView() {

    }

    //if you are in this fragment, load home fragment on backpress
    @Override
    public void doBack() {
        FragmentManager fragmentManager = getFragmentManager();
        FragmentTransaction transaction = fragmentManager.beginTransaction();
        transaction.setCustomAnimations(android.R.anim.slide_in_left, android.R.anim.slide_out_right);
        transaction.replace(R.id.frameLayout, new HomeFragment());
        transaction.addToBackStack(null);
        transaction.commit();
    }
}
fragment_contact_us.xml
<?xml version="1.0" encoding="utf-8"?>
<layout
    xmlns:android="http://schemas.android.com/apk/res/android"
    xmlns:tools="http://schemas.android.com/tools">

<RelativeLayout
    android:layout_width="match_parent"
    android:layout_height="match_parent"
    tools:context=".Fragment.ContactUsFragment"
    android:background="@color/white">

    <TextView
        android:layout_width="wrap_content"
        android:layout_height="wrap_content"
        android:layout_centerInParent="true"
        android:layout_gravity="center"
        android:text="Contact Us Fragment"
        android:textColor="@color/black"
        android:textSize="24dp" />

</RelativeLayout>
</layout>
AboutUsFragment.java
package com.example.androidtestingproject.Fragment;

import android.os.Bundle;

import androidx.databinding.DataBindingUtil;
import androidx.fragment.app.Fragment;
import androidx.fragment.app.FragmentManager;
import androidx.fragment.app.FragmentTransaction;

import android.view.LayoutInflater;
import android.view.View;
import android.view.ViewGroup;

import com.example.androidtestingproject.MainActivity;
import com.example.androidtestingproject.R;
import com.example.androidtestingproject.databinding.FragmentAboutUsBinding;

public class AboutUsFragment extends Fragment implements MainActivity.OnBackPressedListener {
    private FragmentAboutUsBinding binding;
    private View view;

    @Override
    public View onCreateView(LayoutInflater inflater, ViewGroup container,
                             Bundle savedInstanceState) {
        // Inflate the layout for this fragment
        binding = DataBindingUtil.inflate(inflater, R.layout.fragment_about_us, container, false);
        ((MainActivity) getActivity()).setOnBackPressedListener(this);
        view = binding.getRoot();
        initView();
        return view;
    }

    private void initView() {

    }
    //if you are in this fragment, load home fragment on backpress
    @Override
    public void doBack() {
        FragmentManager fragmentManager = getFragmentManager();
        FragmentTransaction transaction = fragmentManager.beginTransaction();
        transaction.setCustomAnimations(android.R.anim.slide_in_left, android.R.anim.slide_out_right);
        transaction.replace(R.id.frameLayout, new HomeFragment());
        transaction.addToBackStack(null);
        transaction.commit();
    }
}
fragment_about_us.xml
<?xml version="1.0" encoding="utf-8"?>
<layout xmlns:android="http://schemas.android.com/apk/res/android"
    xmlns:tools="http://schemas.android.com/tools">

    <RelativeLayout
        android:layout_width="match_parent"
        android:layout_height="match_parent"
        android:background="@color/white"
        tools:context=".Fragment.AboutUsFragment">

        <TextView
            android:layout_width="wrap_content"
            android:layout_height="wrap_content"
            android:layout_centerInParent="true"
            android:layout_gravity="center"
            android:text="About Us Fragment"
            android:textColor="@color/material_on_background_emphasis_medium"
            android:textSize="24dp" />

    </RelativeLayout>
</layout>
Calling HomeFragment() on backpress in Navigation drawer android
As I created an interface in MainActivity(). This interface is implemented in all fragments and overrides its method. These are some basic feature of navigation drawer in android.
In the override method we loaded HomeFragment() by replacing the old fragment from the frameLayout.
Conclusion Of Navigation Drawer In Android Example
Finally we successfully created the Navigation drawer in android studio. All type features are implemented in it.
If there are any problems in this tutorial please comment as well as if this is helpful to you.
See more android and flutter examples. See also More . Learn databinding in android.
Suggestions:
Linear Layout In Android Studio
Relative Layout in Android Studio With Examples
How to generate android debug apk for testing the app
CardView In Android Studio With Examples
Android Splash Screen Full Example
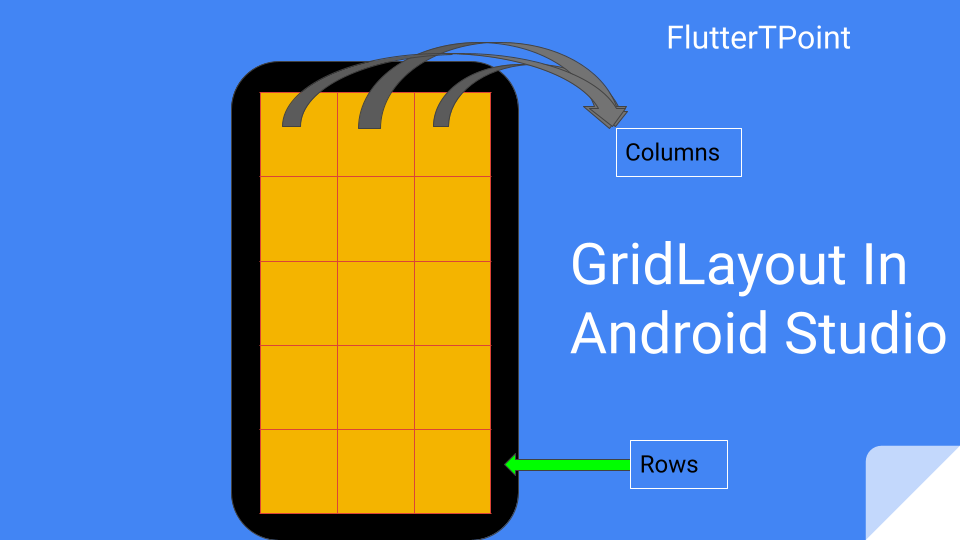
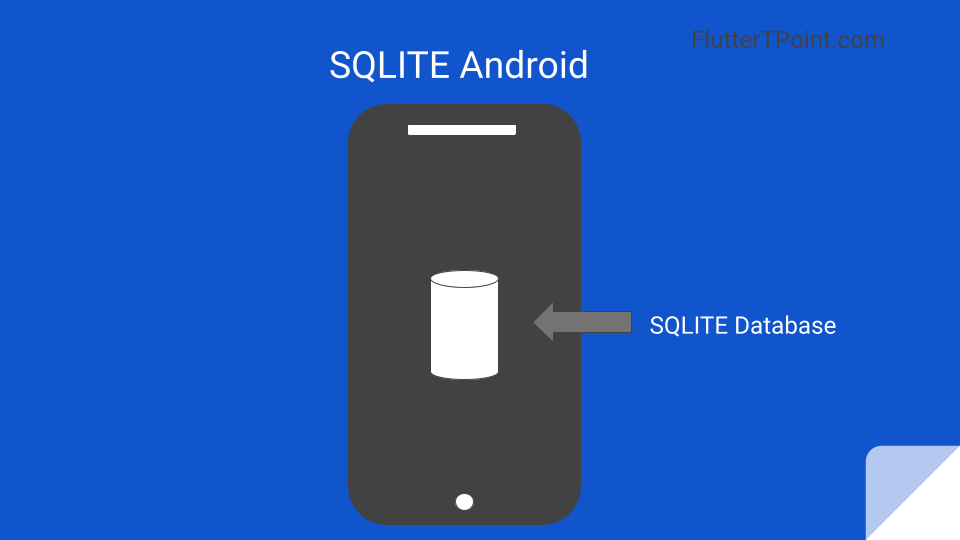
SQLITE Database In Android Studio Example
What is WebView In Android Studio
Pull To Refresh In Android Studio
Opening Camera In Android Studio Examples
Tabs In Android Studio Example
Intent In Android Studio With Examples
Creating Rounded Corner Button In Android Studio
Full Screen VideoView In Android Studio Example
Auto Image Slider In Android Studio Example
Recyclerview in android Complete Example
Android DataBinding Example | Enable Data Binding in Android
Bottom Navigation Bar In Android
Navigation Drawer In Android Studio With Example | FlutterTPoint
Why String are immutable in Java Full Explanation